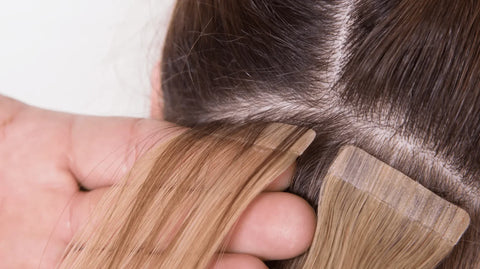
Discover the professional approach to safely removing tape-in extensions using Hair Made Easi Tapes and Tape Remover for a smooth, damage-free process.
When it comes to tape-in hair extensions, proper removal is just as important as correct application. That’s why it should always be carried out by a qualified professional. Attempting to remove tape extensions without the right knowledge or tools can lead to hair breakage, scalp discomfort and unnecessary stress for both the stylist and the client.
At Hair Made Easi, we’ve developed specialist tools to make the removal process faster, safer and more professional from start to finish. This guide is an introduction to our medical-grade Hair Made Easi Tapes and professional-grade Tape Remover, and how they make the job easier for stylists every step of the way.

Professional Tools You’ll Need
Hair Made Easi Tape Remover – Specifically formulated for professional use, this gentle but powerful solution breaks down adhesive quickly without compromising the health of the natural hair and leaves a stunning fragrance on the clients natural hair.
Hair Made Easi Sectioning Clips – Essential for working cleanly through the hair in sections and keeping things controlled.
Refit Brush – Designed to glide through the hair and help remove leftover adhesive with precision.
How to Remove Tape Extensions
1. Section the Hair
Use sectioning clips to separate the hair into clean, manageable sections. This allows you to work methodically and reduce any risk of pulling or tangling.
2. Apply Hair Made Easi Tape Remover
Saturate the tape area thoroughly with the Hair Made Easi Tape Remover. Allow 30 to 60 seconds for the adhesive to break down. This is key to making the removal stress-free for your client’s hair and scalp.
3. Gently Peel Apart the Tapes
Once the adhesive loosens, carefully separate the tapes without pulling or forcing. If any resistance remains, apply more remover and allow additional time.
4. Remove Residue Safely
Use the Hair Made Easi Tape Extension Removal Comb to gently lift away any remaining adhesive. This step is crucial for ensuring the natural hair is left clean and ready for a fresh application.
5. Cleanse and Condition
Follow up with a gentle, sulphate-free shampoo to remove product residue, and finish with a hydrating conditioner or treatment to restore moisture balance.
6. If your client would like her extensions refitting in the same sitting, this is fine too just make sure the hair at the root area is free from conditioning products and it is oil free and the Hair Made Easi products are ready to go!
Why Professional Removal Matters
As stylists, it's our job to protect the condition of our client’s natural hair while delivering great results. Proper removal reduces the chance of breakage and creates a better base for reapplication. Using the right tools not only improves client experience but also saves valuable time in the salon.
More Than Just Removal
Hair Made Easi tapes are designed to work seamlessly with our Tape Remover — making application and removal easier than ever for professionals. They’re strong, long-lasting and easy to re-tape, helping you deliver high-quality results without the hassle.
Want to see the full range of Hair Made Easi professional tools? Visit our website to explore everything you need to elevate your extension services — from install to removal and everything in between.


Comentarios (0)
No hay comentarios todavía. Sé el primero en comentar.